Disclaimer !! The following was generated by ChatGPT 4 !!
To add a shortcut for a program to the KDE menu on your Fedora Linux system, especially after you’ve installed the program using `dnf`, you can follow these steps:
1. **Check if the Program Adds Itself Automatically**:
Most applications installed from official repositories via `dnf` should automatically add themselves to the KDE application menu. However, if the shortcut doesn’t appear, you might need to add it manually.
2. **Manual Addition of Shortcut**:
If the program does not appear in the KDE menu, you can manually create a shortcut using KDE’s menu editor. Here’s how to do it:
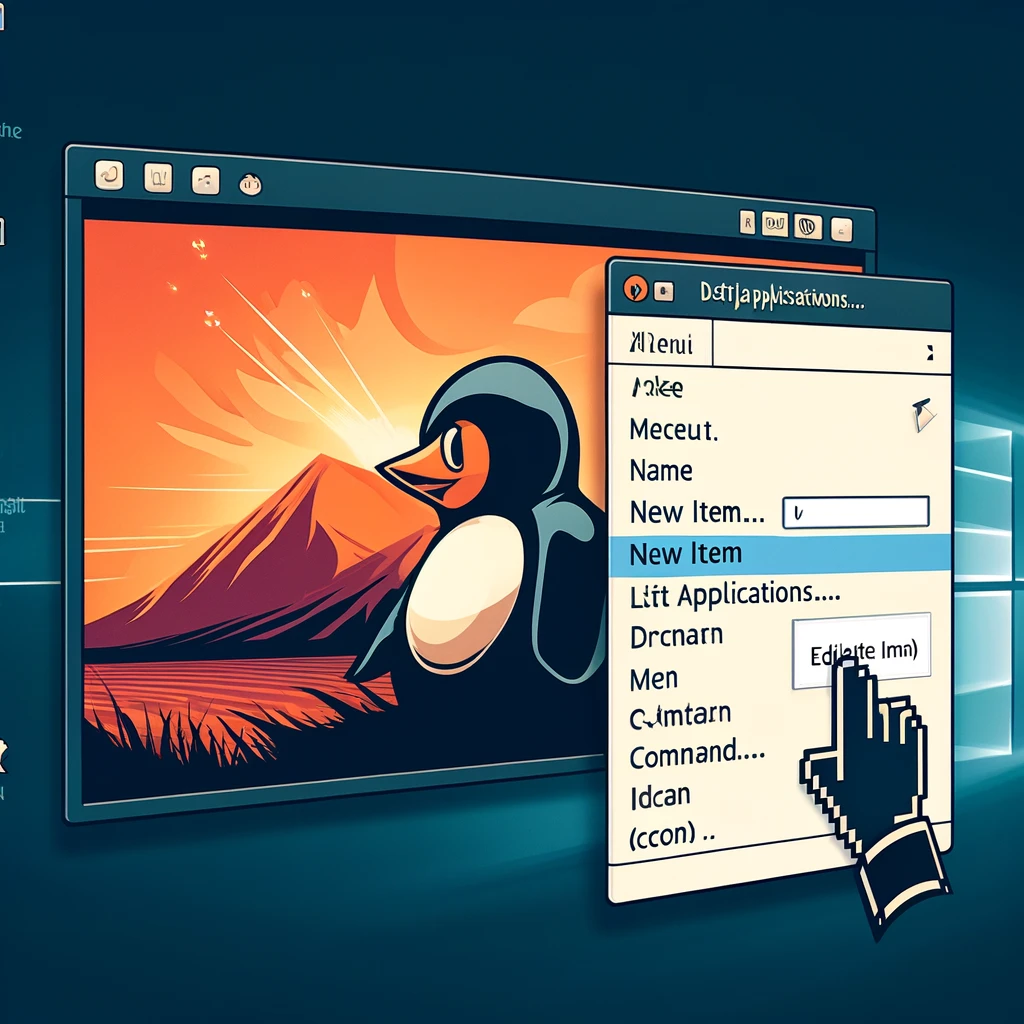
– **Open the KDE Menu Editor**:
You can access the KDE Menu Editor by right-clicking on the application launcher icon (often looks like the KDE logo) on your taskbar and selecting „Edit Applications…“.
– **Navigate to the Desired Category**:
Inside the menu editor, choose the category where you want to place the new menu entry. This could be under „Internet“, „Office“, „System“, etc., depending on the type of application.
– **Add a New Item**:
Click on „New Item“ at the top or right-click on the category and select „New Item“. Name your new menu entry (this will be the name shown in the application launcher).
– **Configure the New Item**:
You’ll need to fill in the following details for the new menu entry:
– **Name**: The name of the application as you want it to appear in the menu.
– **Description**: A brief description of the application.
– **Command**: The command that starts the application. This is typically the name of the executable. If you’re unsure, you might be able to find it by typing `which <application-name>` in the terminal.
– **Icon**: Click on the square next to the ‚Command‘ field to select an icon. You can choose from available icons or browse for an image file that you’d like to use.
– **Save and Close**:
After you have configured the details, click ‚Save‘ to apply the changes. You may need to log out and log back in, or restart the KDE shell (`kwin –replace` in a terminal or Alt+F2 and enter `kwin –replace`) to see the new entry in your menu.
3. **Verify the Shortcut**:
Once you’ve added the shortcut, click on the application launcher and navigate to the category where you added the new item. You should see the new shortcut listed there.
By following these steps, you should be able to successfully add a shortcut to any program you install via `dnf` or otherwise, on your Fedora KDE desktop. If you encounter any issues with the application not starting, double-check the command and executable path specified in the menu editor.
Schreibe einen Kommentar